
Diecast Guides
How to Clean and Maintain an RC Car for Smooth Runs
Oct
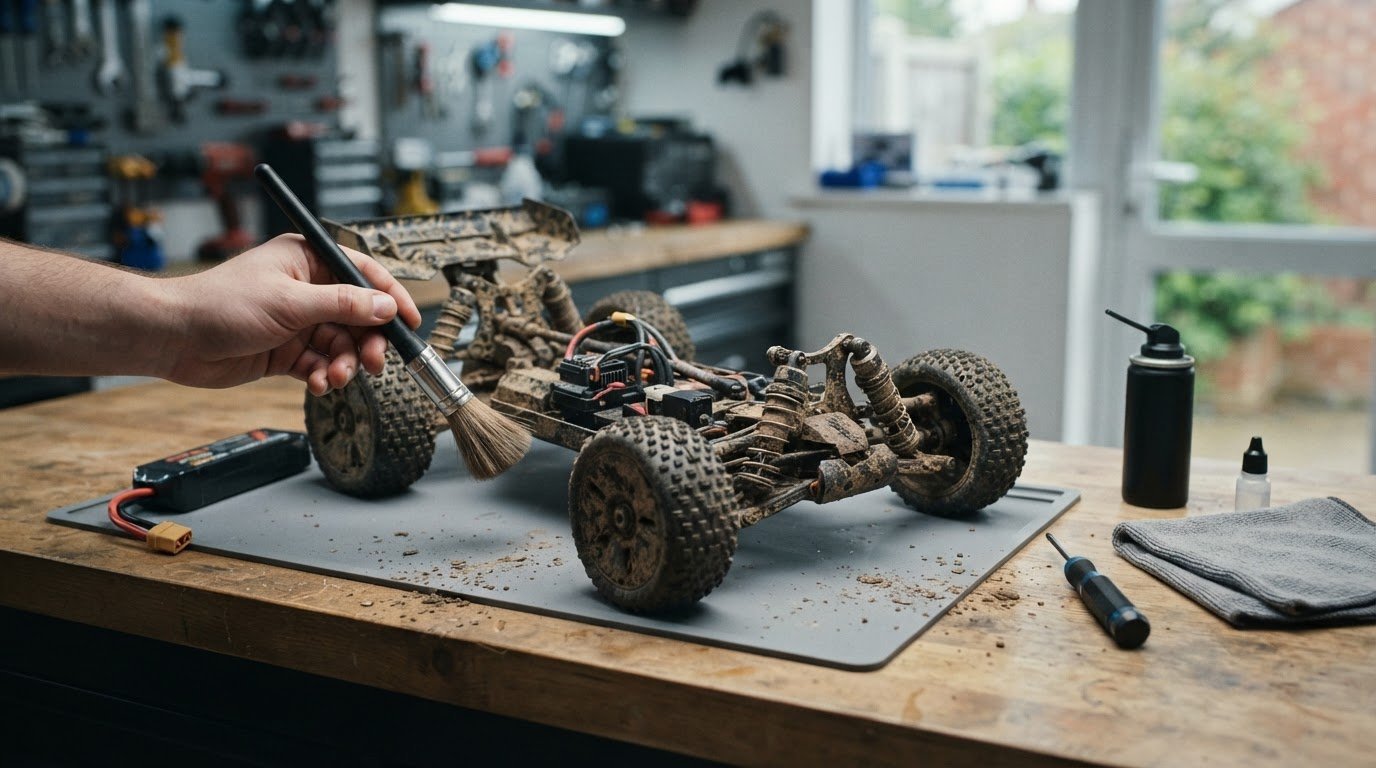
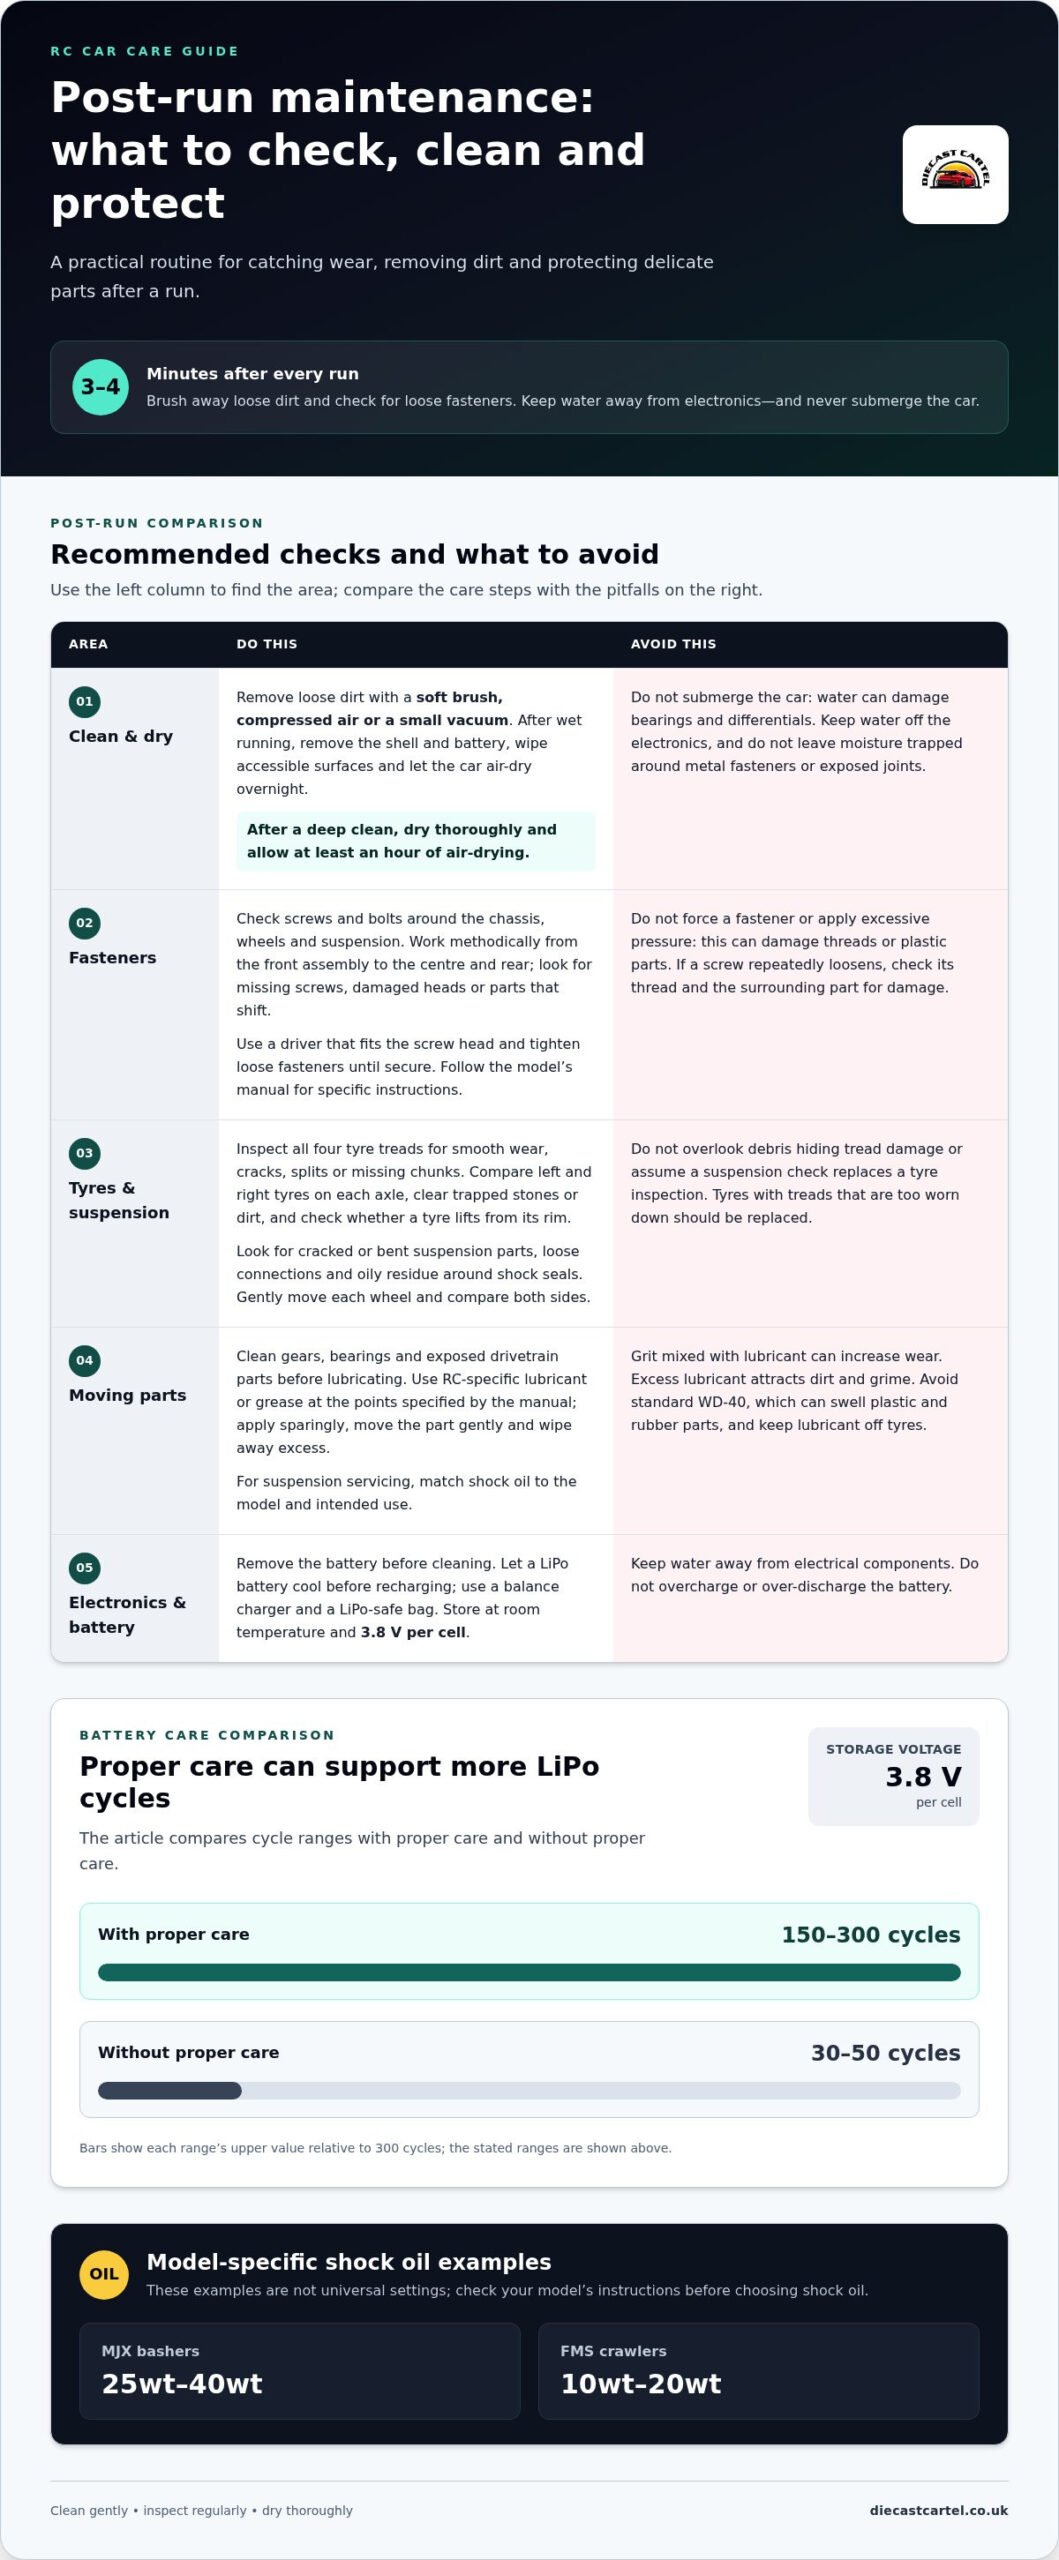
A smooth run often starts with a quick clean. Set aside 3-4 minutes after every run for cleaning and maintaining RC cars: remove loose dirt with a soft brush, compressed air or a small vacuum, and keep water away from the electronics. Never submerge the car, as water can damage its bearings and differentials.
It’s tempting to focus on the next run when your RC car is dusty or splashed with mud. A little care afterwards helps you spot wear before it affects handling. The key is knowing what to check, how to clean gently and which products to keep away from delicate parts.
This guide covers checking fasteners, inspecting tyres and suspension, lubricating moving parts and protecting electronics during cleaning. You’ll also find practical tips for battery care and drying your car after a wet run, helping you build a simple routine that keeps it ready for its next outing.
Key Takeaways
- After each run, give your RC car a quick clean with a soft brush, compressed air or a small vacuum, and check for loose fasteners.
- Look over the tyre treads and suspension for wear, leaks, damage or loose parts before they affect handling.
- Use RC-specific lubricant sparingly on gears and bearings, as excess can trap dirt and grime.
- Remove the battery before cleaning, keep water off the electronics and dry the car thoroughly after wet runs.
Checking and tightening screws and bolts
- Make a post-run fastener check. After every run, spend 3-4 minutes removing loose dirt and checking screws and bolts. Vibration can gradually loosen fasteners, especially around the chassis, wheels and suspension. Use a driver that fits each screw head properly, then tighten loose fasteners until secure. Don’t force them, as excessive pressure can damage threads or plastic parts.
- Work methodically around the chassis. Check one area at a time, such as the front assembly, centre section and rear assembly. Look for missing screws, damaged heads and parts that shift when gently moved. If a fastener repeatedly loosens, inspect its thread and the surrounding part for damage. Follow the model’s manual for any specific tightening instructions.
- Dry the car thoroughly after wet running. Remove the shell and battery, wipe accessible surfaces, then leave the car to air-dry overnight. After a deep clean, dry it thoroughly and allow at least an hour of air-drying. Dry metal fasteners and exposed joints carefully; trapped moisture can encourage rust or corrosion. Keep water away from electrical components.
- Keep battery care separate from chassis checks. Let a LiPo battery cool before recharging, use a balance charger, and charge it in a LiPo-safe bag. Don’t overcharge or over-discharge it. For storage, keep it at room temperature and 3.8 V per cell. Proper care can support 150-300 cycles, compared with 30-50 cycles without proper care.
- Build a routine that catches common problems early. Check fasteners after every run, alongside visible wear, dirt build-up and signs of moisture. Loose screws can affect how parts sit and move, while dampness can lead to corrosion. A short, regular inspection helps you spot these issues before the next outing and address them during cleaning and maintaining RC cars.
Inspecting tyres and suspension
- Inspect each tyre’s tread. Turn the car over and examine all four tyres under good light. Look for tread worn smooth, cracks, splits or chunks missing from the rubber. Compare the left and right tyres on each axle; uneven wear can make the car pull or feel less predictable. Replace tyres when their treads are too worn down.
- Check how securely each tyre sits. Gently turn each wheel by hand and look for a tyre lifting away from its rim. Check for trapped stones or packed dirt around the tread, as debris can hide damage. Clear anything caught in the grooves with a soft brush, then inspect the rubber again before running the car.
- Look over the suspension arms and joints. Check the front and rear assemblies for cracks, bends or parts that appear out of position. Gently move each wheel up and down, noticing any unusual looseness or resistance. Compare both sides of the same axle; a difference can help you spot a loose part or visible damage.
- Inspect the shock absorbers for leaks. Examine the shock bodies and the area around their seals for oily residue. Check that each shock is attached securely at both ends and that its mounting points aren’t visibly damaged. A leaking shock or loose connection needs attention, since it can affect how the suspension responds over uneven ground.
- Finish with a controlled movement check. Press each corner of the chassis down gently, then release it and watch how the suspension returns. Repeat on the opposite side and compare the response. This isn’t a substitute for checking leaks, damage and loose parts, but it can reveal a noticeable difference that deserves closer inspection before your next run.
Keep the tyre check focused on the rubber itself, especially where dirt or stones may have obscured the tread. Once the grooves are clear, compare the tyres again so wear is easier to assess across the car. RC car owners should inspect tyres for wear and replace them when the treads are too worn down. Treat that condition as a reason to replace the tyres, not as something that can be addressed by checking the suspension alone.
Lubricating drivetrain, suspension and steering components
- Clean moving parts before adding lubricant. Brush dirt from gears, bearings and exposed drivetrain components first. Grit mixed with lubricant can increase wear instead of helping parts move freely. Check the manual to identify the lubrication points on your model. Keep lubricant away from surfaces that need grip, such as tyres, and apply only where the design calls for it.
- Choose RC-specific lubricant or grease. Use products made for RC gears and bearings, rather than household sprays. Avoid standard WD-40, which can swell plastic and rubber parts. Different components need different products, so follow the vehicle’s instructions for the drivetrain and steering. If you’re unsure which part you’re treating, identify it in the manual before applying anything.
- Apply a small amount, then check movement. Place lubricant only on the intended moving contact points. Rotate the part gently by hand to distribute it, then wipe away any visible excess. Over-lubricating attracts dirt and grime, particularly around exposed gears and joints. A thin, controlled application keeps the area cleaner than coating an entire assembly.
- Use the specified shock oil for suspension servicing. Silicone shock oil weight affects suspension response, so match it to the vehicle and its intended use. The guidance here gives 25wt-40wt for MJX bashers and 10wt-20wt for FMS crawlers. These are model-specific examples, not universal settings; check your model’s instructions before selecting shock oil.
- Recheck the drivetrain and steering after servicing. Turn the wheels and move the steering gently, looking for binding, uneven movement or lubricant collecting on nearby parts. Clean away residue before it gathers dust. If a gear or bearing still feels rough after cleaning and lubrication, inspect it for debris or damage instead of adding more lubricant.
Treat product choice and quantity as parts of the same careful approach: use RC-specific lubricants or greases for gears and bearings, and keep application restrained. Excess lubricant on moving parts can attract dirt and grime, so adding more is not a substitute for choosing the right product or applying it carefully.
Leave standard WD-40 out of RC-car care: it can swell plastics and rubber. Keeping to RC-specific products and avoiding excess lubricant helps limit the risks of material damage and grime collecting around moving parts.
Protecting electric-car electronics during cleaning
Keep water away from an electric RC car’s electronics whenever you clean it. Follow these steps to remove dirt while protecting the battery, wiring and connectors.
-
Choose safe cleaning tools and products
Use a soft brush, compressed air or a small vacuum to remove loose dirt from the chassis and around electronic components. For a deeper clean, lightly mist only suitable areas, keeping water away from electronics. Don’t submerge the car or pressure-wash it. Avoid acetone and brake cleaner, which can melt plastic parts.
-
Protect electronics before cleaning
Remove the battery before cleaning, then identify the motor, speed controller, receiver, wiring and connectors. Keep water off these components, even if the car has driven over damp ground. Don’t aim compressed air close-up at connectors or moving parts. Gently brush around exposed wiring to lift dust without soaking or disturbing the connections.
-
Clean the car after use
After a normal run, spend 3-4 minutes removing loose dust and debris with a soft brush, compressed air or a small vacuum. Work from the shell towards the chassis, clearing dirt around wheel arches and openings without pushing it into the electronics. For a deep clean, use only a light mist where needed, then dry the car thoroughly and air-dry it for at least an hour.
-
Clean off mud, sand and water
After a muddy or sandy run, remove the shell and battery first. Brush away dried mud and sand before using a light mist on dirty areas; never submerge the car or pressure-wash it. Following wet running, keep water away from electronics, dry accessible surfaces thoroughly and leave the shell off overnight. For full-size car fault-code checks, explore OBD diagnostic tools.
Diecast Cartel: 1:24 scale Diecast models and trucks
Diecast Cartel is a natural next stop if caring for your RC car has sparked an interest in adding another vehicle to your collection. Explore 1:24 scale diecast models and trucks, alongside Diecast Trucks and Tractors and 1:18 Scale Model Cars. For hands-on play, the 1:24 remote control forklift offers another way to enjoy miniature vehicles.
Choose a detailed display model to complement your RC hobby, or discover a different vehicle to enjoy on your next play session. Whether you’re drawn to trucks, tractors or cars, each piece can bring its own character to a collection. To explore the range or find out more, contact Diecast Cartel.
Make every run part of a lasting hobby
Make cleaning and maintaining RC cars part of your regular hobby routine, rather than a chore you leave until something goes wrong. Regular checks help you learn how your vehicle normally feels and sounds, making changes easier to notice. Keep a small notebook with your tools and record anything unusual after a run. Those notes can help you spot recurring wear and plan your next inspection.
There’s always another way to enjoy miniature vehicles, whether you’re adding to a display or keen to explore more remote-control models. Explore Diecast Cartel’s remote-control cars and trucks as you plan what comes next.
Keep your car ready for its next outing, take pride in the small details and enjoy every run.
Frequently Asked Questions
How do you clean an RC car’s motor, electronics and receiver?
Use a dry, soft brush to clean the motor, receiver and other electronic components, working gently around wiring and connectors. Switch off the car and disconnect its battery first. A cotton bud can lift dust from accessible corners without pushing debris into openings. If mud has dried near a connector, loosen it carefully with the brush instead of applying liquid. Inspect the area before reconnecting the battery.
How do you clean and maintain RC car bearings, gears and drivetrain?
Clear dirt from the drivetrain, then inspect exposed gear teeth for chips, cracks or missing sections. Turn the wheels by hand and check for catching or grinding, which may indicate debris or wear. For bearings, consult the model’s manual for service instructions, particularly if they’re sealed. Apply RC-specific lubricant only at the points specified for your model, then check that the drivetrain turns freely.
