
Diecast Guides
How to Paint a Diecast Car for a Smooth, Even Finish

Oct
A smooth finish is won before the first colour coat goes on. To learn how to paint a diecast car, strip away the old paint, clean and dry the metal shell, then use a compatible primer and paint. Build colour with light mist coats rather than one heavy pass, leaving at least 12 hours between paint coats.
It’s tempting to rush straight to the colour when you’re ready to refresh a favourite model. Careful preparation, however, helps paint apply evenly and reduces the risk of rough patches and visible marks. This guide covers disassembly, removing old paint, choosing primer and paint, spraying in steady passes, and allowing coats to dry. You’ll also learn when sanding, masking and clear coat can help complete the finish.
Key Takeaways
- Strip the old finish and clean the metal shell thoroughly before you begin, so the new paint has a prepared surface.
- Choose primer and paint that work together, and build up the colour with light coats rather than trying to cover the body in one pass.
- Keep the aerosol about 12 inches from the model and sweep across it evenly to help avoid rough, uneven coverage.
- Give each coat time to dry before continuing; patience between stages helps protect the finish during sanding and polishing.
Choosing compatible primer and paint
- For a UK repaint, the cost depends on your paint, primer and tools. It also changes according to whether you already own an airbrush or need materials for stripping and preparation. Decide which equipment you have before choosing a paint system, so you can plan the work around it.
- Disassemble the car until only its metal shell remains. Remove the base, glazing, interior, wheels and small fittings carefully, keeping parts organised for reassembly. Don’t paint assembled plastic parts with the shell. Wash parts in warm, soapy water, not hot water, which can warp styrene or polystyrene. Dry the shell fully.
- Choose a primer intended for the surface and paint system you’re using. Primer is recommended for diecast models; lacquer and enamel can both produce good results. Automotive paint applied with an airbrush is another option. Keep primer and colour coats compatible, and follow the paint maker’s instructions for their particular products. Try your chosen combination on an unimportant item first.
- Shake an aerosol can for at least two minutes before spraying. Wear gloves while handling the cleaned shell; oils from your fingers can cause fisheyes or small pinholes. Once the first primer coat is dry, sand it with 600-1200 grit sandpaper. Use light pressure to smooth the surface without cutting through the primer.
- Apply decals to the painted body, then seal them with a good-quality clear coat. Clear coat is optional, but it can make the colour look more vibrant and protect the decals. Build the clear finish with 3-5 coats before a thicker wet coat. If you plan to wet-sand between clear coats, let the clear coat cure completely first. Practise the full sequence on a spare piece before finishing your model.
Removing existing paint
- Before stripping, work only on the bare metal shell. Remove the base, glazing, interior, wheels and fittings, then set every part aside. This keeps stripping products away from plastic and makes the finish easier to inspect.
- Choose a method suited to the existing finish. Factory paint can be thick and uneven, so stripping it can produce a better base than spraying over it. A fresh coat over old paint may leave ridges or uneven edges visible.
- Brake fluid may take a day or two to remove paint from a diecast body. Check the shell as the finish loosens, rather than assuming it has stripped evenly. Let the remaining coating guide when to repeat the removal stage.
- For surface oils and old finishing materials, use a commercial degreaser rather than relying on soapy water alone. Follow its label, since products differ. Keep the treatment focused on the shell and away from parts you intend to reuse.
- Wear gloves when handling the shell and stripping products, and follow each product label. Work carefully to prevent splashes near plastic parts and painted surfaces you’re keeping. Gloves also help stop finger oils that can cause fisheyes or small pinholes.
- After stripping, wash the body and dry it thoroughly to remove brake fluid and residue. Use warm, soapy water for this post-strip wash. Inspect seams, edges and recessed details for leftover finish; don’t begin priming until the shell is clean and dry.
- If paint remains in a recess, repeat the removal and cleaning stages instead of hiding it beneath primer. Leftover coating can show through the new colour and disrupt an even finish. Set the clean shell aside without touching its outer surface.
Spray distance and technique
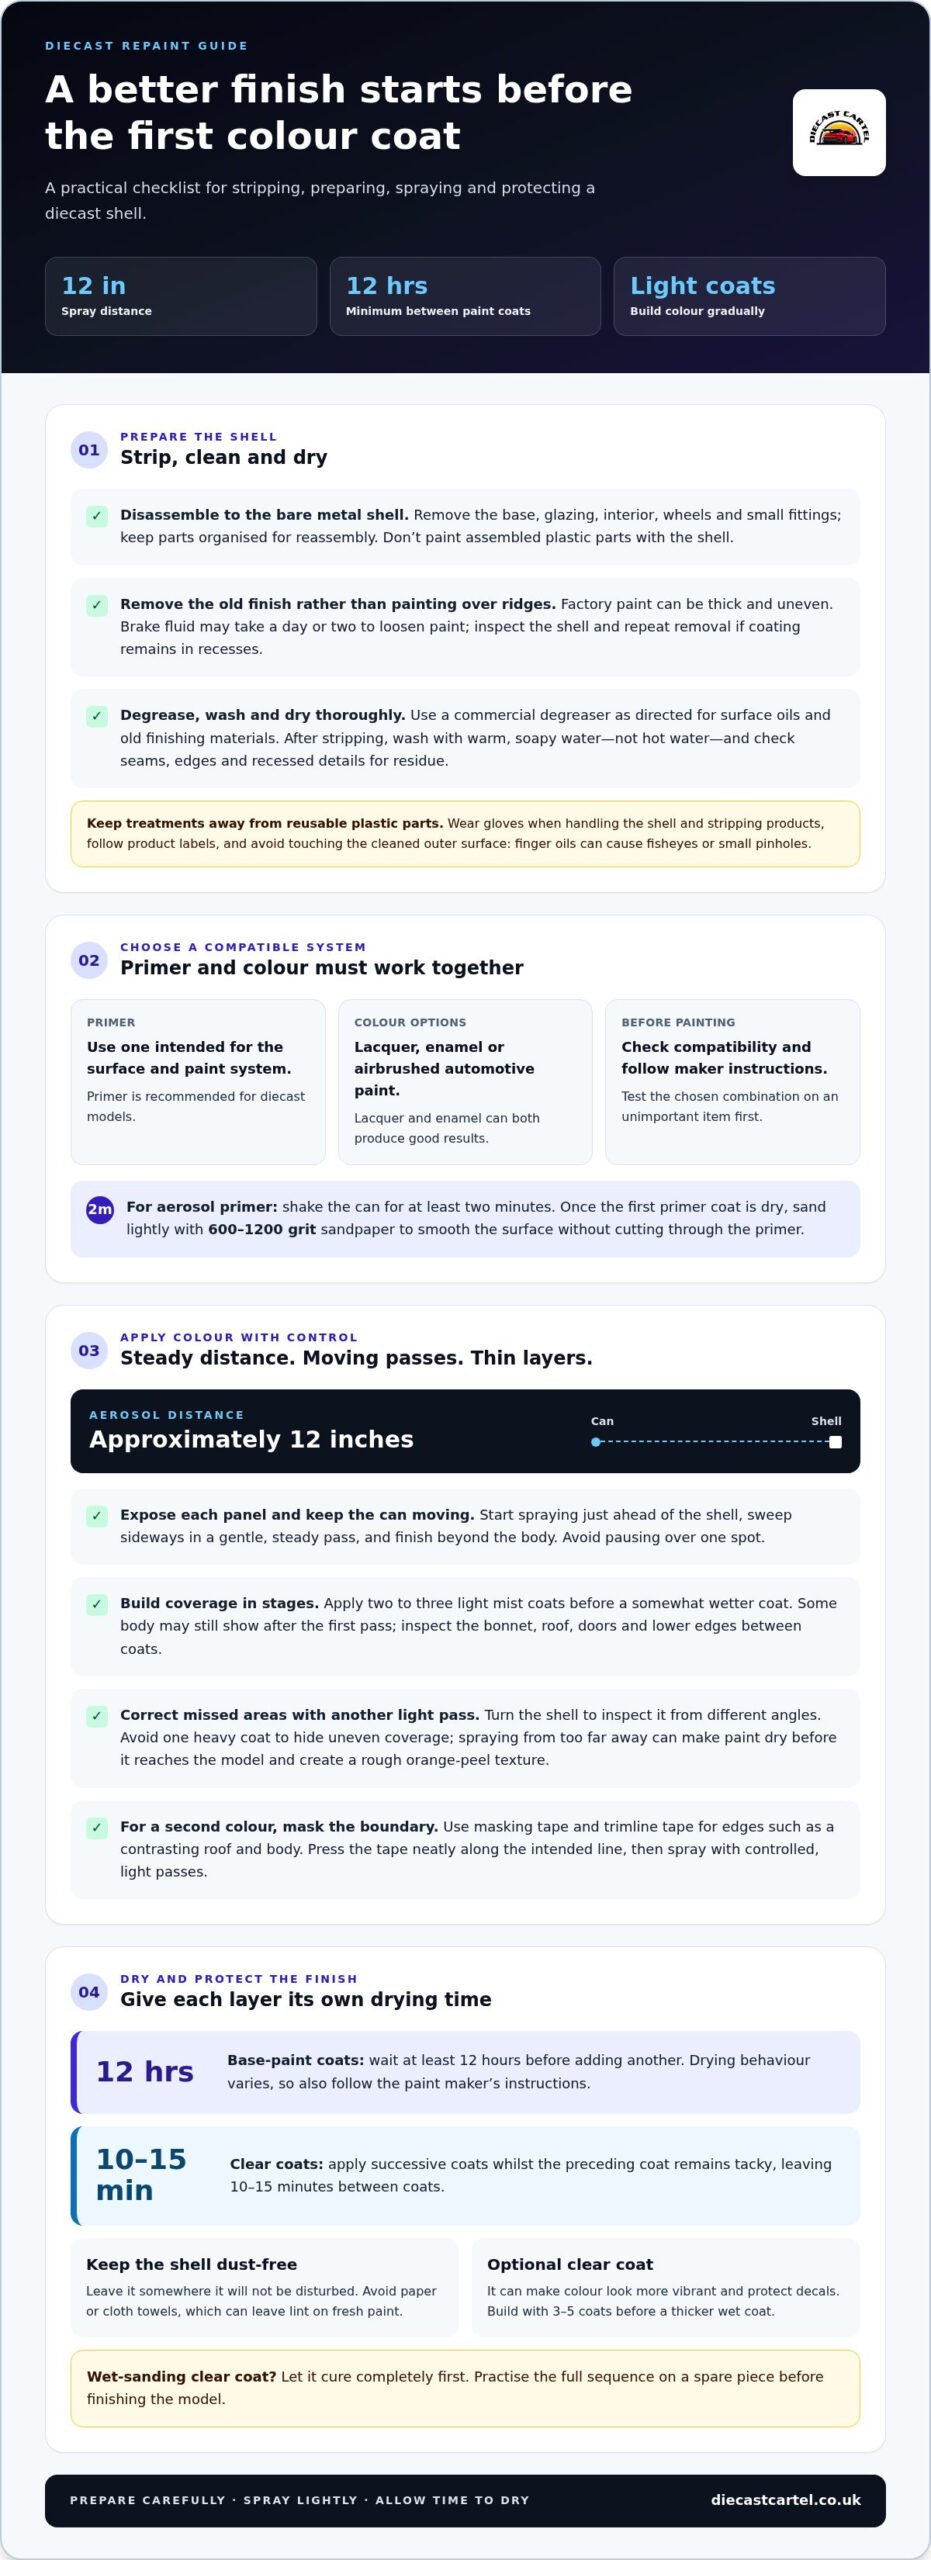
- Set the diecast shell securely before spraying, with each panel exposed. Hold the aerosol can approximately 12 inches from the body. For anyone learning how to paint a diecast car, keeping this distance steady helps control coverage across broad panels and small contours.
- Begin spraying just ahead of the shell, rather than aiming the first burst directly at it. Move the can sideways in a gentle, steady sweep. Starting and finishing beyond the body helps prevent concentrated patches at either end.
- Apply two to three light mist coats before adding a somewhat wetter coat. Keep each pass moving across the panels. Thin layers build coverage gradually, giving you more control than trying to cover bare primer in one heavy application.
- Expect parts of the body to remain visible after the first pass. Continue with light mist coats, building colour gradually. Inspect the bonnet, roof, doors and lower edges between passes to find missed areas before moving on.
- Keep the can moving at a consistent pace as you sweep across the body. Pause only after the spray has passed the model. Holding the spray over one spot can leave a heavier patch than the surrounding panels.
- Avoid spraying from too far away. Paint can begin to dry before reaching the model, creating a rough orange-peel texture. If you’re practising how to paint a diecast car, adjust your distance towards approximately 12 inches on the next pass.
- Mask body sections before spraying a second colour. Use masking tape and trimline tape to define boundaries, such as a contrasting roof and body. Press the tape neatly along the intended edge, then spray with controlled, light passes.
- Check the finish after each thin coat, rather than judging coverage mid-spray. Turn the shell to inspect different angles and spot missed sections. Correct those areas with another light pass; avoid trying to fix them with one heavy coat.
Waiting between paint coats
- After each base-paint coat, wait at least 12 hours before adding another. Thin layers need time to dry, so don’t judge readiness by appearance alone. Follow the paint maker’s instructions too, as drying behaviour varies between products.
- Inspect the finish before continuing. Look across the bonnet, roof and doors for missed areas, dust or uneven coverage. Correct a fault with a light coat, rather than hiding it beneath one heavy application.
- Keep the shell in a clean, dust-free place while it dries. Don’t use paper or cloth towels, which can leave lint on fresh paint. Set it somewhere it won’t be disturbed between coats.
- For clear coat, apply successive coats 10-15 minutes apart whilst the preceding coat remains tacky. Build with 3-5 clear coats before adding a thicker wet coat. Keep each pass controlled across the body.
- Let clear coat cure completely before wet-sanding between coats. Sanding too early can disturb the finish rather than smooth it. Use 6,000-grit sandpaper between coats, then 12,000 grit for the final coat.
- Wait at least 24 hours after applying clear coat before buffing and polishing. For broader finishing work, allow the model-car paint around two weeks to harden fully. That gives the finish time to firm up before handling and polishing.
- Once the paint has hardened, wet-sand the finish with 1,500-grit paper before polishing with rubbing and polishing compounds. Work carefully over raised details, where sanding can remove paint faster than on flat panels.
- Give each stage its own drying time, from base colour through clear coat and final polishing. If you’re choosing a model for a future repaint project, browse diecast models and pick a shell that suits your planned finish.
Diecast Cartel: 1:24 scale Diecast models and trucks
Diecast Cartel offers 1:24 scale diecast models and trucks for collectors choosing their next addition. If you’ve enjoyed refreshing a model’s finish, exploring another shape or scale can keep that hands-on interest going. The range also includes diecast trucks and tractors, alongside 1:18 scale model cars.
Think about what you most enjoy displaying: a compact car, a detailed truck or a tractor with a distinctive silhouette. For a different kind of miniature vehicle, Diecast Cartel also offers a 1:24 remote control forklift. These options give collectors different subjects to enjoy, whether they’re building a display or simply choosing a new favourite.
For your next diecast model, contact Diecast Cartel to explore the available options.
Make your next model your own
Learning how to paint a diecast car opens up more than a fresh colour scheme. Each project lets you explore a personal theme, recreate a favourite real-world vehicle or create a distinctive look for your display. Let the model’s lines and details guide your choices, then decide what story you want the finish to tell. The result can make a familiar shape feel uniquely yours.
As you plan another addition to your collection, think about the scale, subject and character you’d most enjoy living with. A new model can become the starting point for your next creative idea, whether you keep it as supplied or plan a future custom finish. If you’d like help with your next choice, contact Diecast Cartel for help. Keep exploring, take pride in your collection and enjoy every project along the way.
Frequently Asked Questions
What primer and paint work best on diecast cars?
Choose a primer suitable for metal, followed by compatible lacquer or enamel paint. Each layer needs to work with the next, so avoid combining products that may react. Check product labels for surface suitability and application instructions. If you’re using enamel paint, for example, select a primer designed to accept it, then test the combination on a spare piece first.
Can you use automotive spray paint on diecast models?
Yes, automotive paint can be used on diecast models, including with an airbrush. Check that it is suitable for the prepared metal body and compatible with your primer and clear coat. Practise on an unimportant item first, especially if you’re new to airbrushing. This helps you assess the spray pattern and colour before painting the model’s visible panels.
How to prepare and sand a diecast car body for repainting?
Remove the model’s parts, strip the old finish, wash the shell and let it dry fully. Once the primer has dried, smooth its first coat using 600-1200-grit sandpaper. Keep your pressure light and work evenly over broad panels, taking care around raised badges, edges and moulded details. Those areas have less surface paint to work with, so avoid sanding through the primer.
How to spray paint a diecast car evenly without runs?
Hold the aerosol approximately 12 inches from the shell and keep it moving in a gentle sideways sweep. Start each pass just before the body and carry it past the other edge. Build coverage with two to three light mist coats before a somewhat wetter coat. If a panel looks thin, add another light pass rather than slowing down over one spot.
How long should primer, paint and clear coat dry on a diecast car?
Allow at least 12 hours between paint coats. For clear coat, apply successive coats 10-15 minutes apart while the previous coat remains tacky. Let clear coat cure completely before wet-sanding, and wait at least 24 hours before buffing or polishing. Allow the paint around two weeks to harden fully before finishing work, and follow the product label if it gives different instructions.
