
Diecast Guides
DIY Diecast Model Repairs: A Collector’s Step-by-Step Guide
Oct
What if the safest first move in a repair is to put the glue down? A loose wheel or detached mirror can look like a quick fix, but DIY diecast model repairs risk disturbing the finish or losing a tiny original part. Start with a careful inspection, not a rushed fix.
If you’ve hesitated over whether a damaged model is safe to handle, you’re not alone. A repair that suits a play-worn model may not be right for a rare or sentimental addition to your collection.
This guide explains how to assess common damage, prepare your workspace and approach minor faults cautiously. You’ll also learn when to stop, leave the model as it is and prioritise preserving its originality. A little patience can help prevent a thoughtful repair from becoming damage you can’t undo.
Key Takeaways
- Sort visible damage into cosmetic, loose-component or structural issues before choosing how to respond.
- Set up a well-lit work area with a soft surface or tray to protect the model and keep small parts together.
- Match DIY diecast model repairs to the fault, and treat force or unexpected resistance as a signal to stop.
- Photograph and inspect the model before making one small, deliberate repair. Avoid dismantling more than necessary.
- Consider whether a repair could affect the model’s original condition before cleaning or handling it further.
DIY diecast model repairs: assess the damage before you begin
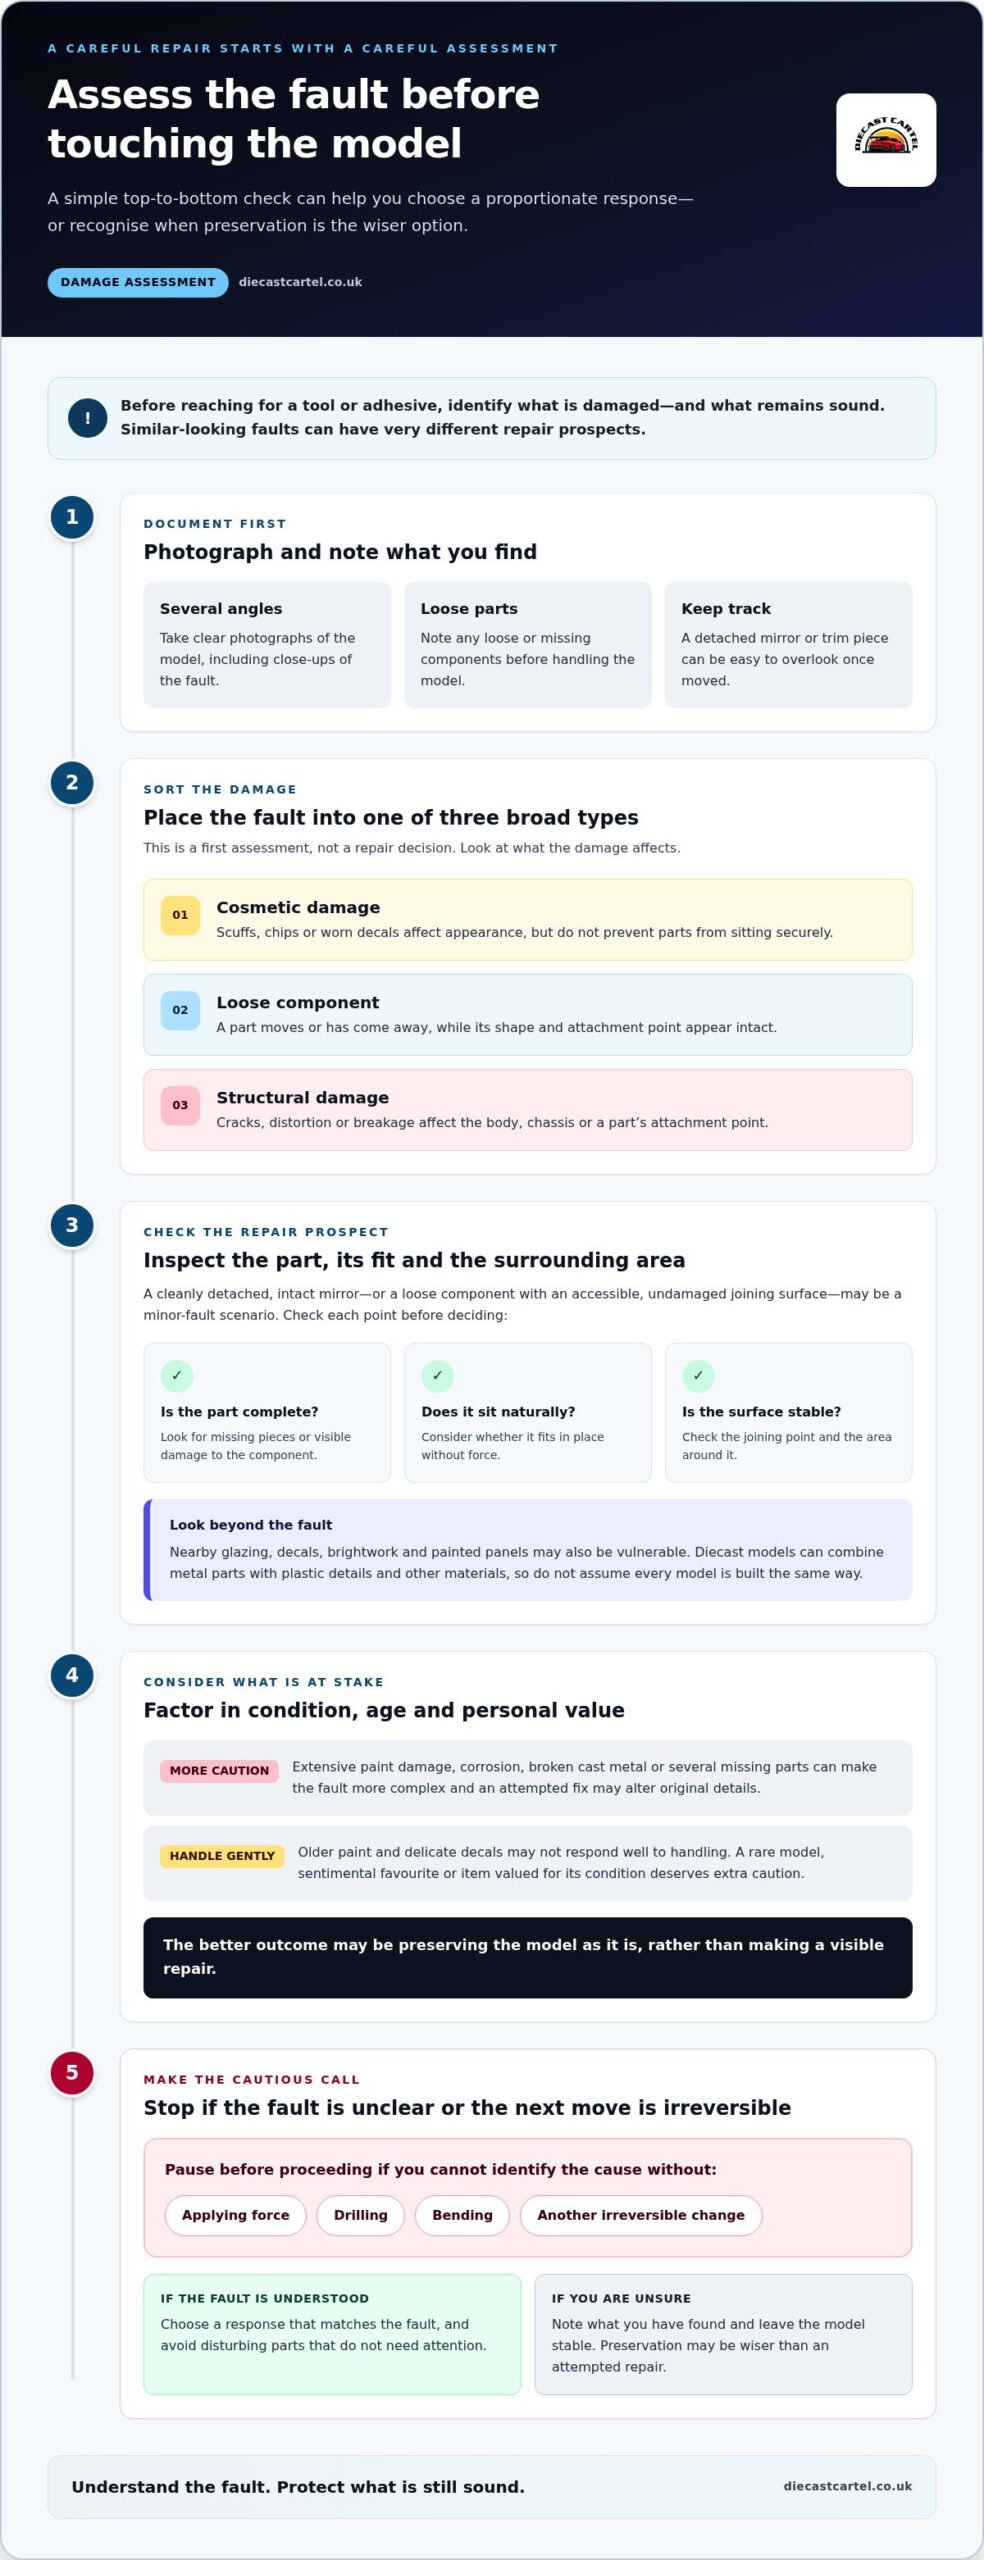
Some small faults may be manageable at home, but that doesn’t make every repair suitable for DIY. Before reaching for a tool or adhesive, identify what’s damaged and what remains sound. This helps you choose a proportionate response or recognise when leaving the model untouched is wiser.
Take clear photographs from several angles, including close-ups of the fault. Note any loose or missing parts before handling the model. A detached mirror or trim piece can be easy to overlook once it’s moved. Then sort the visible damage into three broad types:
- Cosmetic damage: scuffs, chips or worn decals that affect appearance but don’t prevent parts from sitting securely.
- Loose components: a part that moves or has come away, with its shape and attachment point apparently intact.
- Structural damage: cracks, distortion or breakage affecting the body, chassis or a part’s attachment point.
This distinction matters because similar-looking faults can have different causes. A mirror that has detached cleanly is not the same repair prospect as one with a cracked stem or bent mounting point. Consider the model’s construction too: die-cast toys may combine metal parts with plastic details and other materials. The Die-cast toy overview explains the general manufacturing process and materials. Use it as background, rather than assuming every model is built the same way.
Which diecast model faults might be suitable for a careful DIY fix?
A cleanly detached, intact mirror or a loose component with an accessible, undamaged joining surface may be a minor-fault scenario. Check the part before deciding: is it complete, does it sit naturally in place, and is the surrounding surface stable? Consider nearby glazing, decals, brightwork and painted panels too. They can be vulnerable, so assess what might be affected as well as the part you hope to secure.
When should you pause before repairing a diecast model?
Extensive paint damage, corrosion, broken cast metal or several missing parts raise the stakes. The fault may be more complex than it first appears, and an attempted fix could alter original details. A rare model, a sentimental favourite or an item whose appeal depends on its condition deserves extra caution. The better outcome may be preservation rather than a visible repair.
Age and finish matter as well. Older paint or delicate decals may not respond well to handling, and a model with personal meaning may be worth keeping exactly as it is. If you can’t identify the cause without applying force, drilling, bending or making another irreversible change, stop. Note what you’ve found and leave the model stable. DIY diecast model repairs should begin only when you understand the fault and can weigh the possible consequences.
Prepare for DIY diecast model repairs with a safe, organised workspace
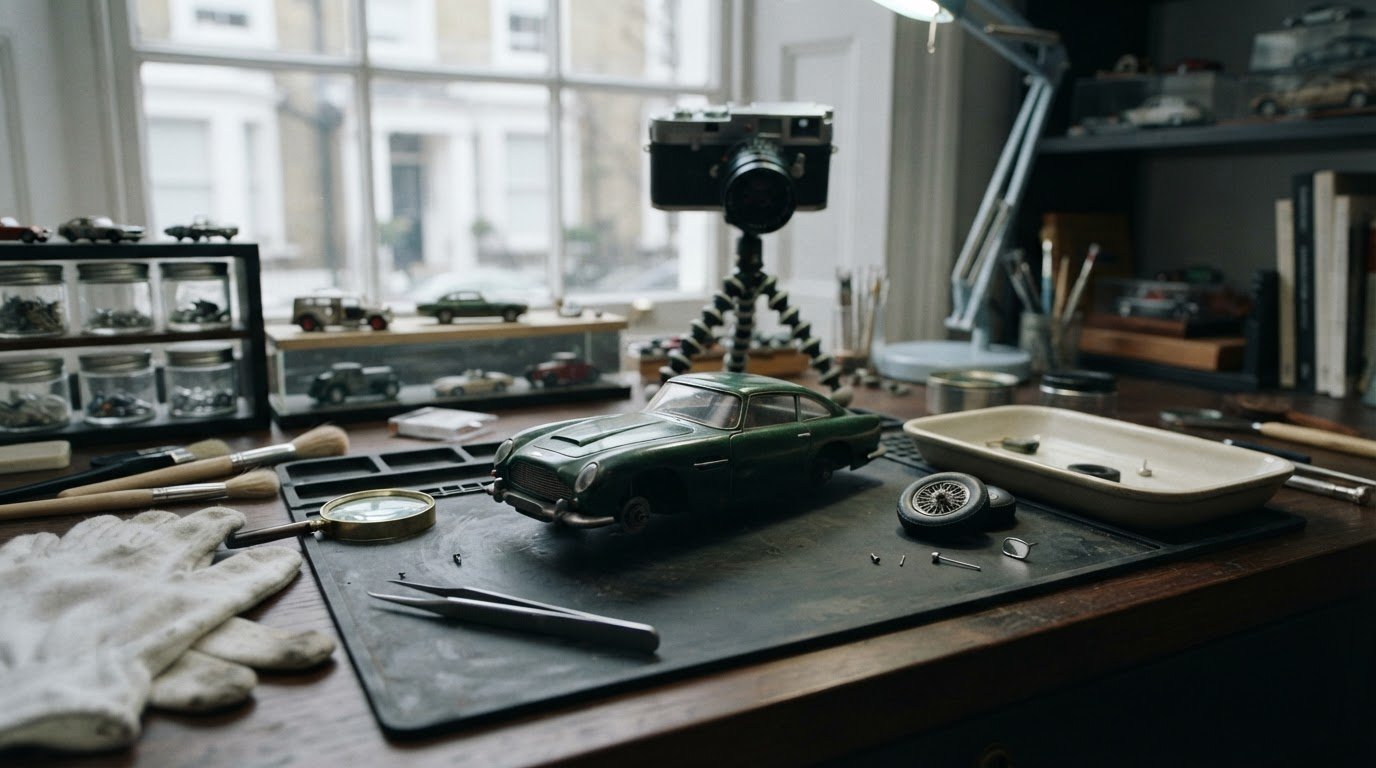
A calm workspace makes it easier to handle a model gently and see what you’re doing. Choose a clean, well-lit table where you can sit comfortably, then cover it with a soft, stable mat. A shallow tray or small containers can stop parts rolling away, while good lighting helps you spot delicate fittings and surface details without repeatedly turning the model in your hands.
Before starting DIY diecast model repairs, gather only what the specific fault calls for. A tidy setup is more useful than a large collection of tools. Fewer items on the table means less chance of knocking or misplacing something.
What should you prepare before a small model repair?
Keep suitable small hand tools, a soft brush and a parts tray within reach, but choose each item for the model and task. A tool that’s too large or forceful can mark a surface or damage a fitting. Keep the original packaging and any loose parts nearby where available, so you can compare shapes and keep components together.
- Soft brush: for gently moving loose dust without rubbing the finish.
- Parts tray: to contain small components while you work.
- Suitable hand tools: selected for the fault, without dismantling parts that don’t need attention.
- Product instructions: read labels for any cleaner or adhesive you’re considering, including material compatibility and handling guidance.
Lay everything out before picking up the model. If the task needs a tool you don’t have, pause rather than improvising with a blade, household implement or excessive force.
How can you protect paint, glazing and small details?
Work over the soft mat or tray, and support the model by sturdy areas of the body or chassis. Avoid gripping mirrors, aerials, bumpers or trim, as these details can bend or break under pressure. Keep adhesive and cleaning products away from painted surfaces, decals and clear glazing unless you’ve established that they’re suitable for those materials.
Don’t assume a product that seems mild is safe for a model. Household cleaners, automotive polish, alcohol and solvents can affect finishes, so avoid them unless the model’s manufacturer specifically recommends them. Soaking a model or scrubbing it with an abrasive cloth can also loosen decals, dull paint or damage delicate details.
- Check what each surface is made of before choosing a product.
- Test any compatible cleaner or adhesive on an inconspicuous area first, if practical.
- Use the smallest amount needed and keep it away from neighbouring surfaces.
- Stop if the finish changes, a decal lifts or clear parts become cloudy.
Preparation helps preserve the character of a collection, not just the model you’re repairing. If you’re setting up a space to care for a growing collection, browse diecast model cars, trucks and tractors from Diecast Cartel’s range.
How to approach common DIY diecast model repairs
Different faults call for different responses. A loose part, a paint chip and a cracked body aren’t variations of the same job, so don’t reach for one repair method by default. Use the visible condition as a guide, and treat the table as a cautious first check, not a promise that every fault is suitable for home repair.
| Visible fault | Cautious first action | Reason to stop |
|---|---|---|
| Loose or detached detail | Check whether the part is intact, then see if it sits naturally in place without pressure. | It’s cracked, distorted, incomplete or won’t align freely. |
| Paint chip or worn decal | Identify whether the damage is limited to the finish and consider leaving it as it is. | Repair would involve sanding, repainting or altering surrounding original detail. |
| Crack, bent fitting or broken body | Inspect the affected area without bending or dismantling it. | The damage is structural, spreading or difficult to assess without force. |
| Corrosion or several missing parts | Document the condition and avoid disturbing it further. | You can’t tell how far the damage extends or what parts are affected. |
What is a cautious approach to a loose or detached part?
First, check that the component is complete and its attachment point hasn’t split. If it appears intact, dry-fit it gently: hold it in its natural position and see whether it rests correctly. Don’t force a piece into place or bend it to make it fit. If it resists, the shape or fitting may be damaged, or the part may not belong in that position.
Consider adhesive only when the parts and materials are suitable and the product instructions support that use. Adhesives vary: two-part epoxy is used for metal-to-metal bonding, while gel cyanoacrylate can suit small detail parts. Neither is a universal choice. Use the minimum amount needed, and keep it clear of glazing, moving parts and visible surfaces. Cyanoacrylate fumes can fog clear plastic, so take particular care around windows and lights. Don’t proceed if you can’t control where the adhesive will go.
How should you handle a chip, crack or damaged finish?
A paint chip affects the surface; a crack in the body or a damaged fitting may affect the model’s structure. Look closely to distinguish them, but don’t scrape or pry at the area to find out. A chip may sit beside decals, trim or another finish that would be hard to match.
At model scale, matching and blending a new finish into existing paint can be difficult. Sanding, filling and repainting may permanently change original details, so they aren’t beginner-friendly default fixes. For a valuable model, pause unless you have a clear plan and understand the likely effect on its finish. The same applies to drilling or dismantling: if the repair depends on an irreversible step, stop and preserve the model rather than turning a minor fault into a larger one.
Follow a careful step-by-step process for DIY diecast model repairs
A simple sequence helps keep a small repair controlled. Decide in advance what you’ll do and what will make you stop. If a part resists, the fault looks worse once exposed, or the next step would require force or an irreversible change, pause rather than improvising. Knowing when to stop is part of the process.
- Document the model. Photograph the damage close up and from a wider angle. Note the affected area, the condition of nearby paint or glazing, and any loose parts. These images give you a reference if you need to compare alignment later.
- Diagnose the fault. Identify what the affected parts are made of, whether a component is intact, and how it appears to attach. Consider nearby moving features and delicate details. If you can’t tell what’s broken without bending or prising anything, stop here.
- Prepare for this specific task. Set out only the tools or product you’ve chosen for the fault. Read the product instructions, including compatibility and handling guidance. Support the model and arrange the loose component so you can position it without fumbling.
- Attempt one minimal repair. Make a single, controlled intervention. For an adhesive repair, use only a small amount and keep it away from visible surfaces, glazing and moving parts. Don’t combine methods or add more product just because the first attempt doesn’t look finished.
- Allow the product to set, then inspect. Follow the chosen product’s instructions for any curing or drying period. Don’t handle or test the join before the instructions allow. Once ready, assess the result gently under good light.
How can you inspect the model after a repair?
Compare the result with your original photographs. Look for correct alignment, visible residue and any change to nearby paint, decals or glazing. Check from more than one angle: a part can look straight from above but sit unevenly from the side. If the repair involves a component designed to move, test its movement only if you can do so without pressure. Don’t wiggle a fixed detail or stress-test a delicate fitting.
If you notice fresh damage, clouding, excess adhesive or a part sitting out of place, stop rather than trying to tidy it with a cleaner or extra force. Further handling may make the problem harder to address. Record what you did, including any product used and the repair date, then keep removed or replaced parts with the model. A short note can be useful if you revisit the repair later or pass the model on.
Good DIY diecast model repairs are measured by care, not by how much you change. Once the model is safely back on display, browse diecast models to discover another addition for your collection.
After DIY diecast model repairs: preserve the model and plan your next step
A repair isn’t automatically an improvement. If an attempt changes original paint, removes a decal or leaves adhesive visible, the model may be less true to its original condition than before. After a considered repair, resist the urge to keep adjusting it simply to make the result look perfect. Sometimes the most collector-minded next step is to stop.
Pay attention to changes. If a part shifts, the finish changes or you spot damage you hadn’t seen before, don’t add more adhesive, cleaner or force. Keep the model supported and avoid further handling while you decide what to do. If you’re uncertain about the material or a repair would involve extensive work, dismantling or another irreversible change, leave it as it is for now.
How can you protect a model after a DIY repair?
Follow the chosen product’s instructions for curing or drying before handling or displaying the model. Until then, keep it stable somewhere it won’t be knocked, covered in dust or disturbed by routine handling. Store any removed pieces and your repair notes together, so the model’s history stays with it.
Once the repair is ready, choose a display or storage spot where the affected part won’t catch on nearby objects. Avoid picking the model up by the repaired area. Keep the before-and-after photographs with a brief record of the date, the fault and any product used. This gives you a reference if the same area changes later or another collector eventually cares for the model.
- Keep the record together: pair photographs and notes with the model’s existing paperwork or packaging.
- Retain removed parts: label and store them safely, even if they appear unusable.
- Handle thoughtfully: support the model by a solid area rather than its repaired detail.
When is preserving the original condition the better choice?
For a rare, sentimental or already fragile model, restraint can be the best decision. Uncertain materials, widespread damage and repairs that require sanding, drilling or repainting are good reasons to pause. You don’t have to act immediately. Preserving the model’s current state gives you time to consider what matters most about it.
Collectors make these choices at every stage of the hobby, from a first model to a long-held favourite. If you’re weighing condition alongside the pleasure of collecting, this beginner’s guide to starting a die-cast collection offers wider collecting context. Each model can mean something different to its owner, and there’s no single right way to care for a collection.
Choose preservation over a risky fix whenever the likely change outweighs the benefit. When you’re ready to add another piece to your collection, explore Diecast Cartel’s range of diecast model cars, trucks and tractors.
Let care guide your next collecting decision
A model doesn’t need to look untouched to deserve a place in your collection. Sometimes the most thoughtful choice is to leave a flaw alone; sometimes a small, carefully considered fix helps you enjoy the piece more. Let your connection to the model, its condition and the possible risks guide your decision. That balance is at the heart of DIY diecast model repairs.
As your collection grows, each new model brings its own story, details and display possibilities. Diecast Cartel is a UK-based online retailer specialising in diecast collectibles, with 1:18 and 1:24 scale model cars, trucks and tractors to explore. Ready to find a new favourite for your shelf or cabinet? Explore Diecast Cartel’s diecast model range.
Take your time, trust your judgement and enjoy caring for the models that make your collection yours.
Frequently Asked Questions
Can you repair a broken diecast model car at home?
Yes, some minor faults can be repaired at home if the affected part is intact and the repair won’t put surrounding details at risk. A detached mirror with an undamaged fitting may be more manageable than a cracked chassis or broken cast-metal body. Before attempting DIY diecast model repairs, consider the model’s condition and personal significance. If a repair needs force or changes the structure, preserving it untouched may be wiser.
What is the best glue for repairing a diecast model?
There isn’t one adhesive that suits every model or fault. Two-part epoxy is used for metal-to-metal bonding, while gel cyanoacrylate can suit small detail parts. Check the product instructions for the materials involved and use only a controlled amount. Cyanoacrylate fumes can fog clear plastic, so avoid using it near glazing. An adhesive that works on a metal join may be unsuitable for a plastic fitting or painted surface.
How do you repair paint chips on a diecast model?
A paint chip can be left as part of the model’s history. Touching it up isn’t always the best choice. Before considering paint, identify the finish and check whether a decal or trim detail is nearby. Even a close colour match can look different under light, and blending at small scale is tricky. Don’t use household cleaners, polish or solvents to prepare the spot unless the model’s maker recommends them.
Can a DIY repair affect a diecast model’s collector value?
Yes, a repair can affect how collectors view a model, particularly if it changes original paint, decals or parts. The impact depends on the model and the quality of the work, so it’s not possible to assume every repair affects value in the same way. Keep photographs and notes of any work, and retain original pieces. If condition or originality is central to the model’s appeal, consider leaving it unchanged.
How can you tell whether a diecast model is made from metal or plastic?
Check the packaging, manufacturer’s description or any markings on the underside first. These may identify materials without risking damage. A magnet can offer a clue, but it isn’t conclusive: a model may combine metal and plastic parts, and not every metal part will respond to a magnet. Don’t scratch the paint or use heat to test a surface. If you can’t identify the material safely, avoid products that depend on knowing it.
Should you dismantle a diecast model to repair it?
Usually, don’t dismantle a model unless the repair genuinely requires access and you understand how its parts are secured. Screws may be removable, but a joint that appears fixed could require drilling or force to separate, risking damage to the body or finish. Check for visible fasteners and manufacturer guidance before proceeding. If access depends on an irreversible step, leave the model assembled rather than turning a small fault into a larger one.
How do you keep small diecast parts from getting lost during a repair?
Work over a shallow, light-coloured tray so a small dark part is easier to spot if it slips. Put each removed piece straight into a labelled container rather than leaving it beside the model. Take a quick photograph before moving parts, especially if several pieces come from the same area. Keep the tray away from table edges and household activity, and store unused parts with the model once you’ve finished.
